How to Remove Embroidery from a Shirt: Master Guides
Are you looking to remove embroidery from a shirt? You may want to update an old garment, repurpose it, or fix a mistake.
Whatever your reason may be, removing embroidery can seem like a daunting task.
However, with the right tools and techniques, you can successfully remove embroidery from a shirt without damaging the fabric.
In this article, I will guide you through the process step by step, ensuring you can achieve your desired results.
Removing embroidery from a shirt requires patience and attention to detail.
How to Remove Embroidery from a Shirt: Step-by-Step Process
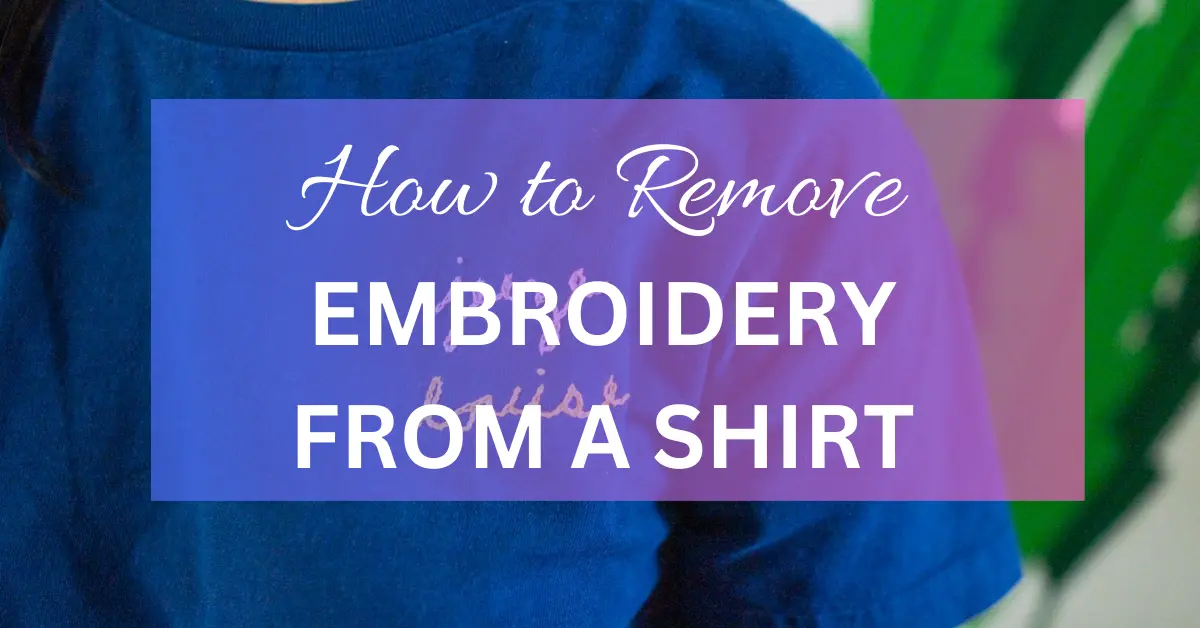
Before we dive into the step-by-step process, let’s briefly discuss what embroidery entails. Embroidery is the art of decorating fabric with needle and thread, creating intricate designs and patterns.
While embroidery adds beauty to garments, there may come a time when you wish to remove it. By following the instructions provided in this guide, you’ll be able to remove embroidery effectively.
Assessing the Embroidery
Evaluating the embroidery on your shirt before you begin the removal process is essential.
Look closely at the design’s stitches, thread types, and density.
This assessment will help you determine the best approach for removing the embroidery without causing damage.
My observations and experiences in my own words ⬇⬇⬇:
Barry Allen
Before removing this embroidery, I take a good, hard look at it. I inspect every stitch, checking the threads used and how tightly they’re packed. It’s like sizing up the enemy before a battle – gotta know what you’re up against, right?
First off, I note the type of stitches used. Are they basic straight stitches or more complex satin stitches? This tells me how intricate the work is and how much care I need.
Then, I examine the threads themselves. Are they thick and tightly wound or thin and delicate? This helps me gauge how easy (or tricky) it’ll be to remove them without leaving a mess.
Lastly, I eyeball the density of the embroidery. Is it a dense patch covering a large area, or just a few scattered motifs? This gives me an idea of how much time and effort I must put in.
After this thorough assessment, I’m ready to formulate my game plan for removing this embroidery without wrecking my shirt.
Related: How To Thread An Embroidery Needle (Step By Step)
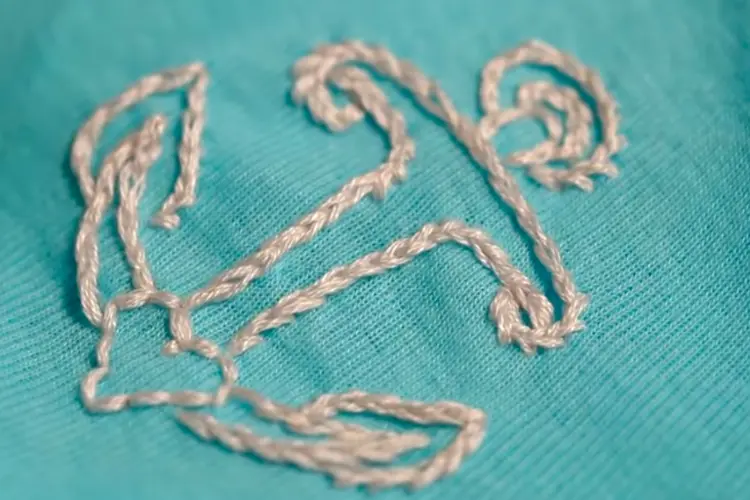
Gathering the Necessary Tools
To successfully remove embroidery from a shirt, you’ll need a few tools:
- Small, sharp scissors or a seam ripper
- Tweezers
- Thread and needle in a matching color (optional)
- Fabric marker or tailor’s chalk (optional)
- Iron and ironing board (optional)
My observations and experiences in my own words ⬇⬇⬇:
Barry Allen
Now that I’ve sized up my embroidery nemesis, it’s time to gather my arsenal of tools. Trust me, you don’t want to go into battle unprepared!
First up, I grab my trusty small scissors – the sharper, the better. These babies will help me snip away those stitches like a pro. If you’re feeling fancy, a seam ripper can do the trick.
Next, I snatch up my tweezers. These will be my go-to for plucking out any stubborn bits of thread that refuse to budge.
Here’s where things get optional: I might grab some thread and a needle in a matching color. If little holes are left behind after the embroidery is gone, a few well-placed stitches can patch things up nicely.
Oh, and remember a fabric marker or tailor’s chalk. These are handy for marking out any areas I want to avoid or guiding my hand as I work.
Lastly, if I want to smooth things out, I’ll fire the iron and set up my ironing board. A little heat can work wonders for flattening the fabric and making everything look crisp and clean again.
With my tools at the ready, I’m armed and dangerous – prepared to tackle this embroidery removal confidently!
Preparing the Shirt
Before removing the embroidery, prepare the shirt on a clean, flat surface.
Smooth out any wrinkles, ensuring that the fabric is taut and stable. This will make the removal process more accessible and more precise.
My observations and experiences in my own words ⬇⬇⬇:
Barry Allen
It’s time to get this shirt prepped and primed for embroidery removal action. First things first, I lay it out flat on a clean surface. No wrinkles allowed – I smooth those out like I’m ironing out a tough negotiation.
Why all the fuss? An excellent, flat surface means I can work more efficiently and accurately. There are no wonky angles or wobbly stitches – just a stable canvas ready for surgical thread removal.
I make sure the fabric is nice and taut, too. Pulling it gently in all directions helps me get a good grip on the embroidery area and prevents unnecessary stretching or distortion.
This prep work might seem like a small detail, but trust me, it sets the stage for a smoother, more successful embroidery removal process. With my shirt prepped and ready to roll, I feel confident and prepared to tackle the next step!
Related: How to Remove Embroidery From Backpack
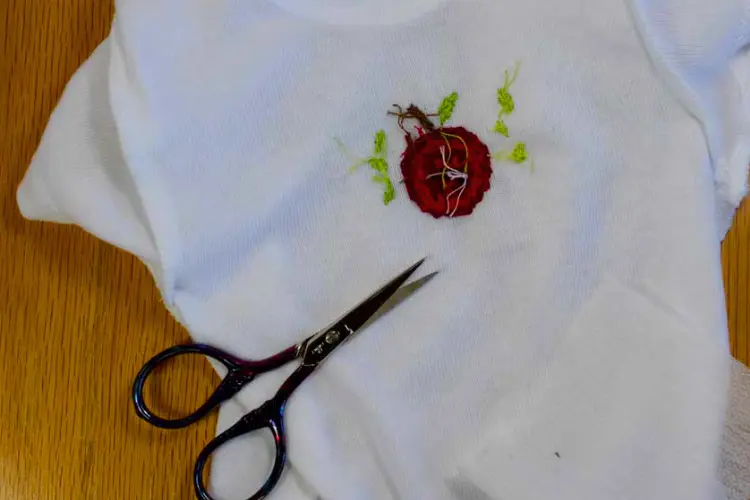
Removing the Embroidery
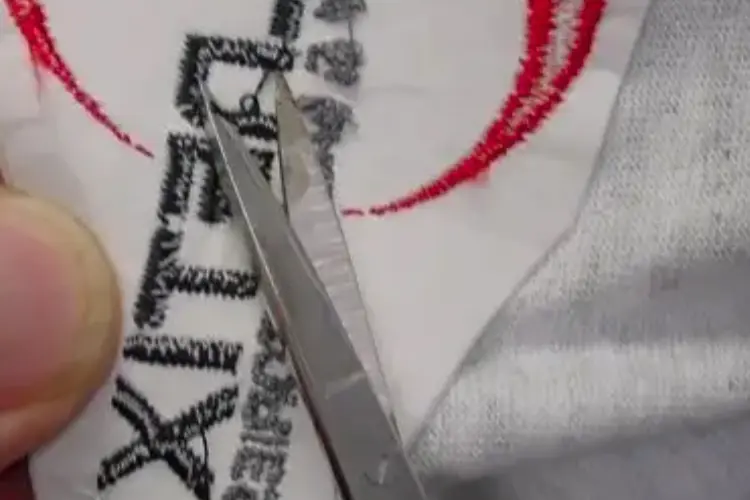
To remove the embroidery, carefully cut the threads connecting the stitches. Use short, strong scissors or a seam ripper for this task.
Work gradually and gently to avoid harming the cloth. Start from one end of the design and progressively work toward the opposite end.
My observations and experiences in my own words ⬇⬇⬇:
Barry Allen
It’s time to get down to business and bid farewell this embroidery. Armed with my trusty scissors or seam ripper, I dive right in.
With a steady hand and a focused mind, I carefully snip away at the threads connecting the stitches. It’s like performing delicate surgery – I must be precise and gentle to avoid any collateral damage to the fabric.
I start at one end of the design and work methodically to the other, ensuring I don’t miss any stitches or accidentally cut into the shirt.
Patience is critical here – rushing through could lead to mistakes and ruin the shirt. So, I take it slow and steady, keeping my eye on the prize: a clean, embroidery-free shirt.
Bit by bit, stitch by stitch, I chip away at the embroidery until, finally, it’s all gone. Mission accomplished! With a sense of satisfaction, I move on to tidying up loose ends and giving my shirt a well-deserved victory press.
Removing Residual Threads
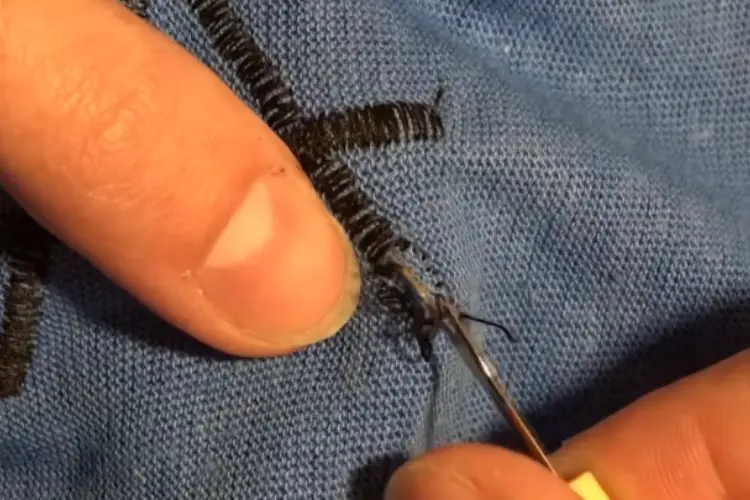
After removing the bulk of the embroidery, you may notice residual threads or small bits of yarn left behind.
Use tweezers to pull out these remaining threads gently. Be cautious not to forcefully pull on the fabric, as it can cause damage.
My observations and experiences in my own words ⬇⬇⬇:
Barry Allen
Alright, we’re almost there – but wait, what’s this? Some pesky leftover threads clinging to my shirt like stubborn cobwebs? Not on my watch!
After tackling the bulk of the embroidery, it’s time for precision work with my trusty tweezers. I carefully pluck out those lingering bits of yarn, one by one, like a meticulous gardener weeding out unruly sprouts.
Here’s the trick: gentle is the game’s name. I handle the fabric with care, making sure not to tug or pull too hard. After all, I’ve come this far – I’m not about to let a few stray threads ruin my handiwork!
With a steady hand and a keen eye, I pick away at those remnants until my shirt is as smooth and clean as the day it was born. Ah, satisfaction at last!
And there you have it – a step-by-step guide to removing embroidery from a shirt like a pro. With patience and perseverance, you, too, can bid farewell to unwanted stitches and breathe new life into your favorite garments.
Related: Tips to Select Fabric Shredder for Home Use
Finishing Touches

Once you have removed the embroidery and any residual threads, inspect the shirt for any visible marks or holes.
You can use a fabric marker or tailor’s chalk to cover any remaining marks if necessary.
Also, you may sew a patch or appliqué over the area where the embroidery was to conceal it further.
My observations and experiences in my own words ⬇⬇⬇:
Barry Allen
The hard part’s over, but we’re still in progress! Now it’s time to put the finishing touches on our freshly liberated shirt.
First, I give it a thorough once-over, inspecting every nook and cranny for any signs of damage or leftover marks. If I spot any pesky remnants, I whip out my fabric marker or tailor’s chalk and work magic to cover them up. It’s like using a magic eraser to banish any lingering traces of the embroidery’s existence.
But why stop there? If I want to take things to the next level, I might sew on a patch or appliqué over the area where the embroidery used to be. Not only does it add a cool, personalized touch to my shirt, but it also helps to conceal any evidence of its former life as an embroidered masterpiece further.
With these final flourishes, my shirt is ready to reclaim its place in my wardrobe. Embroidery be gone – and hello, fresh new look!
Washing and Drying the Shirt
Washing and drying it is essential before you can wear or use the shirt again.
Follow the care instructions on the garment’s tag, confirming that you select the appropriate settings.
This will help to dismiss any remaining defects and restore the fabric’s texture and appearance.
My observations and experiences in my own words ⬇⬇⬇:
Barry Allen
Now that we’ve bid farewell that pesky embroidery, it’s time to give our shirt a well-deserved spa day – washing and drying!
But hold your horses – before we dive into the laundry, we have to check the garment tag for those all-important care instructions. We want to make sure we’re treating our shirt right, after all.
Once my settings are dialed in, I toss my shirt into the wash and let the machine work magic. A thorough cleaning helps banish any lingering defects and restore the fabric to its former glory.
After the wash cycle is done, it’s time to dry. Depending on the fabric and care instructions, I suggest air-drying or tossing it in the dryer on a gentle cycle.
And voila! After a spin in the laundry, my shirt emerges fresh, clean, and ready to rock. No more pesky embroidery – just pure, unadulterated style. It’s time to strut my stuff with confidence!
Related: How to Use an Embroidery Machine
Tips and Tricks
If the embroidery is densely stitched, you can use a seam ripper to carefully cut the threads without damaging the fabric.
For delicate fabrics, such as silk or satin, place a stabilizer or interfacing underneath the embroidery while removing it to prevent the material from puckering or tearing.
Take breaks while removing the embroidery to prevent strain on your hands and eyes.
If you need more clarification about removing the embroidery, consider seeking assistance from a professional tailor or seamstress.
Conclusion
Removing embroidery from a shirt can be a rewarding process that allows you to transform or repair your garment.
Following the step-by-step guide, you can confidently remove embroidery without compromising the fabric’s integrity.
Remember to work patiently and attentively, taking precautions to avoid damaging the shirt. With practice, you’ll quickly develop the skills to tackle embroidery removal projects.
Check related videos on YouTube at Md. Mridul Kabiraz Channel:
Frequently Asked Questions “FAQs”
Yes, you can remove embroidery from various fabric types. However, assessing the fabric’s delicacy and taking necessary precautions is essential, especially with more delicate fabrics like silk or satin.
While the removal process should be done carefully, there might be some residual marks or small holes. You can cover these with fabric markers or tailor’s chalk or even sew a patch or appliqué over the area.
Yes, a seam ripper can effectively remove embroidery from thick fabrics. Take your time and work slowly to avoid damaging the fabric.
If you need clarification on removing embroidery yourself or if the garment is valuable or delicate, it’s advisable to seek help from a professional sewer or tailor.
If the embroidery is in good condition, you can repurpose it for other projects. Keep it stored safely until you’re ready to use it again.